Backing up your WordPress website is a critical task that ensures the safety and security of your valuable data. Whether you’re a blogger, business owner, or developer, having a reliable backup system in place is essential to protect your website from unexpected issues such as hacking, data loss, or software conflicts.
In this guide, we will take you through a detailed process of how to backup your WordPress website using the highly recommended Updraft plugin.“
Understanding the Importance of Website Backups
Website backups act as a safety net, allowing you to recover your website’s content, files, and databases in case of emergencies. Here are a few reasons why having a backup system is crucial:
- Backup in Absence of Hosting Provider’s Backup: If your hosting provider does not offer backup services or has limited backup options, then you should install an updraft plugin that helps you automatically backup up your websites.
- Protection against Data Loss: Your website faces various risks such as hacking attempts, malware infections, server failures, human errors, or problematic software updates. By maintaining up-to-date backups, you can swiftly restore your website to a previously functional state if any of these issues occur, mitigating the impact of data loss.
- Testing and Development Flexibility: Backups serve as a valuable resource for testing new features, themes, or plugins on your website without impacting the live version. If any issues arise during testing, you can effortlessly revert to a backup, enabling seamless development and experimentation.
- Simplified Website Migration: During the migration of your website to a new hosting provider or server, backups streamline the process. By restoring a backup on the new server, you save time and effort, ensuring a smooth transition.
- WordPress Updates and Compatibility: WordPress and its plugins are regularly updated to enhance their features, address security vulnerabilities, and fix bugs. However, these updates can sometimes lead to compatibility issues or conflicts that result in unexpected errors. In the event that such problems occur after upgrading, you have the option to restore your website to its previous state.
Introducing Updraft: A Reliable Backup Solution
Updraft is a powerful WordPress plugin that simplifies the backup and restoration process for your website. Learn how to backup your WordPress website easily with some key features of Updraft, which include:
- Scheduled Backups: Updraft allows you to schedule automatic backups at regular intervals, ensuring that your website’s data is always up to date.
- Incremental Backups: This feature optimizes backup times and server resources by only storing the changes made since the last backup. It significantly reduces the backup size and improves efficiency.
- Remote Storage Options: Updraft supports various remote storage options, including cloud services like Google Drive, Dropbox, and Amazon S3. You can choose the one that suits your preferences and easily store your backups offsite for added security.
- One-Click Restoration: With Updraft, restoring your website to a previous state is a breeze. The plugin allows you to effortlessly retrieve your backup files and restore them with just a single click.
Setting Up Updraft for Your Website
Now that we understand the importance of website backups and the features offered by Updraft, let’s dive into the step-by-step process of setting up Updraft for your WordPress website:
Step 1: Installation and Activation
Log in to your WordPress dashboard.

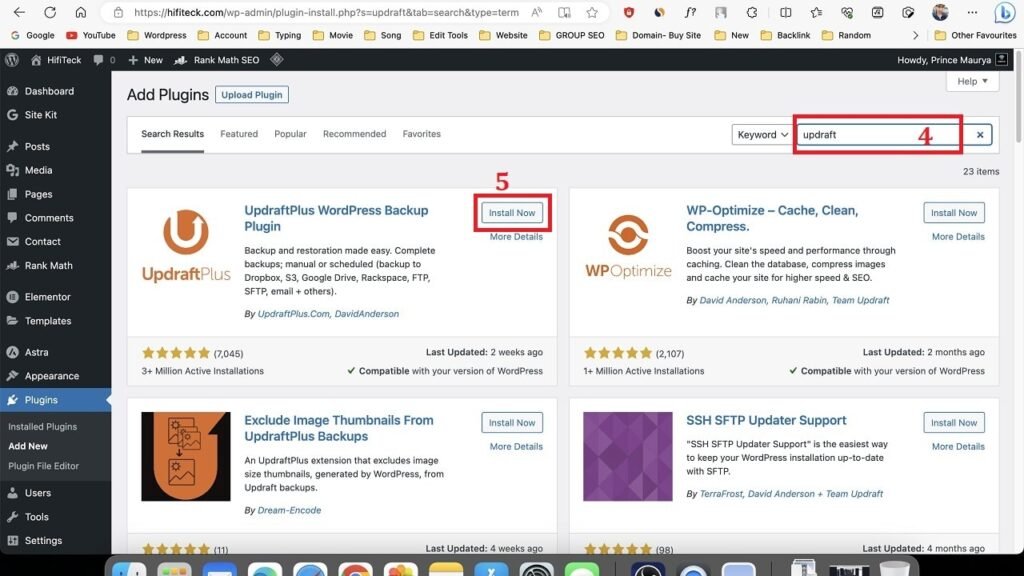
Go to “Plugins” and click on “Add New.”

Search for “Updraft” (4) in the search bar. & Click on “Install Now”. (5)
After installation, click on “Activate” to activate the plugin. (6)

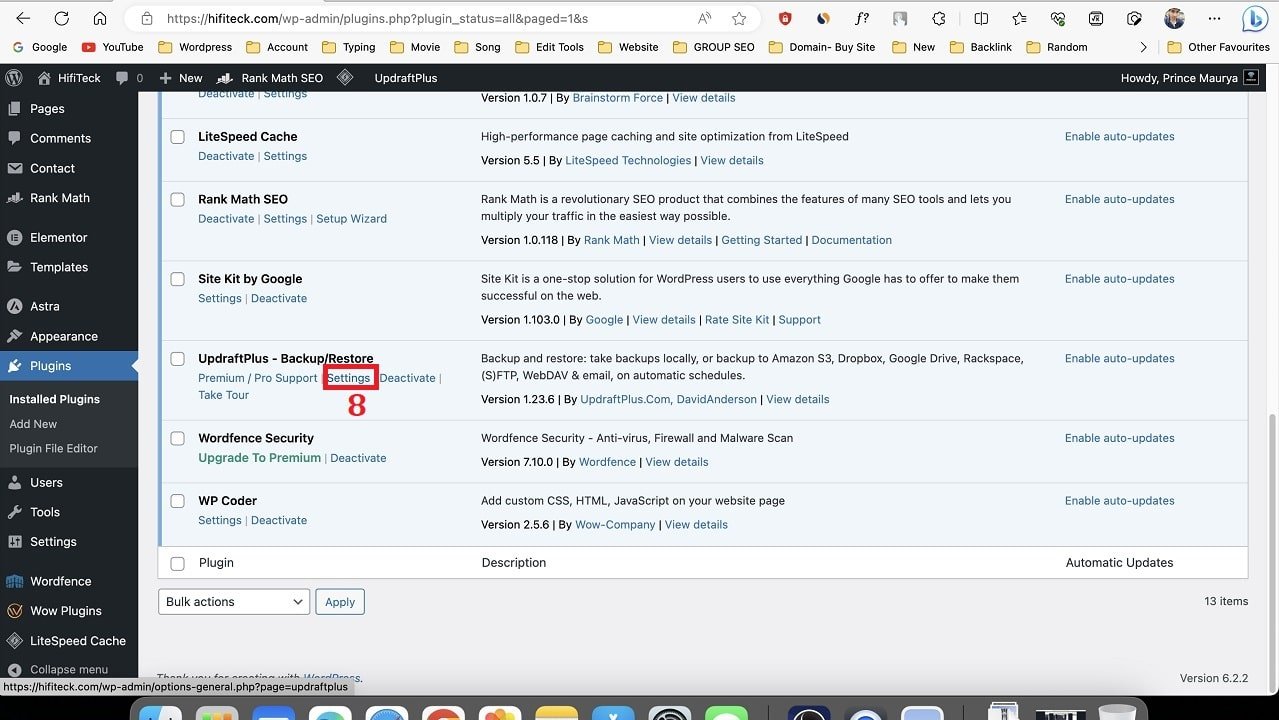
After activating, click on “Installed Plugins” & scroll down (7).

Step 2: Configuring Updraft Settings
Once the plugin is activated, Click on “Settings” under the Plugins menu. (8)
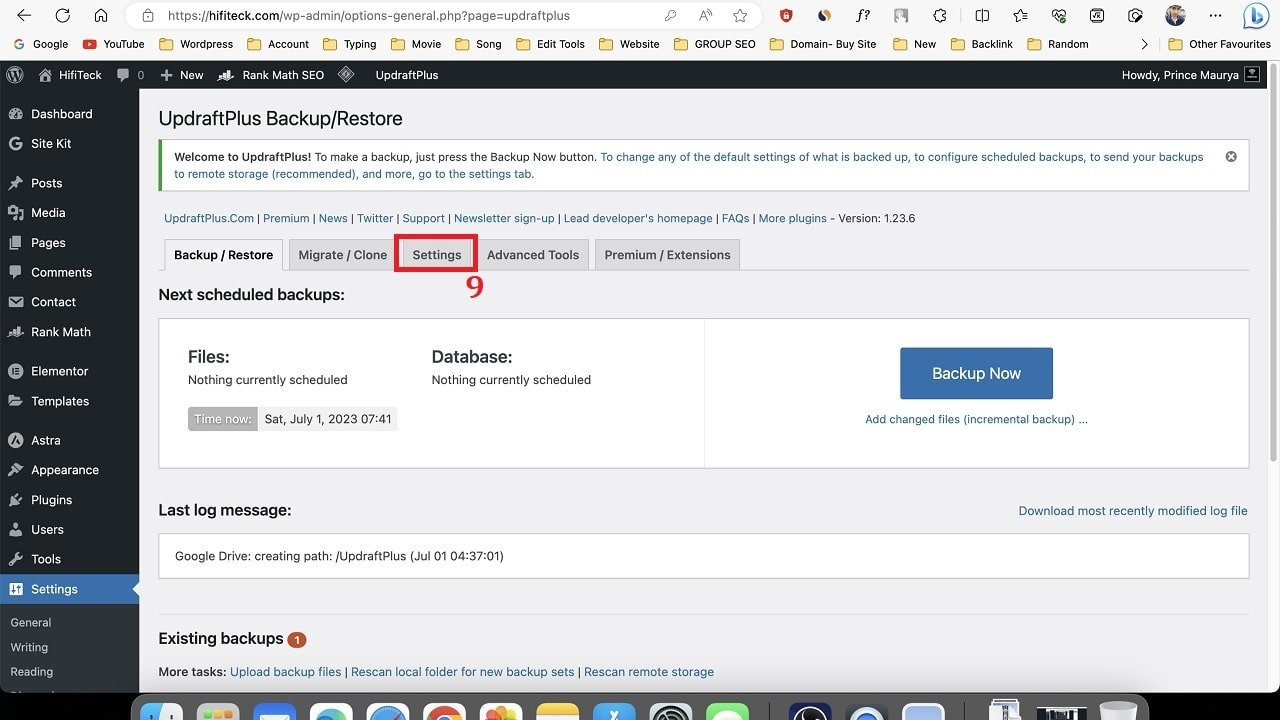
Click on “Settings” under the UpdraftPlus menu. (9)
First, choose your desired backup frequency based on your preferences. You have various options to consider: manual backups, backups every 2 hours, backups every 4 hours, backups every 8 hours, backups every 12 hours, daily backups, weekly backups, fortnightly backups, and monthly backups. Additionally, determine the number of backups you wish to store, and the system will automatically delete the older ones. (10)
Same thing for the database. (11)

Scroll down to the “Choose your remote storage” section and select a remote storage option like Google Drive, Dropbox, or another preferred option. (13)
You have the option to rename the folder name where the backup file is stored in google drive. (14)

Scroll down and Check Options (Plugins, Themes, Uploads & Any other directories found inside wp-content). (15 & 16)

Scroll down

Scroll down, Check for receiving reports on email & click the “save changes” button. (19 & 20)

Scroll up, and Sign google drive account.(20)

Select the correct Gmail if multiple Gmail logins.

Click the “Allow” Button for the store backup file on google drive,

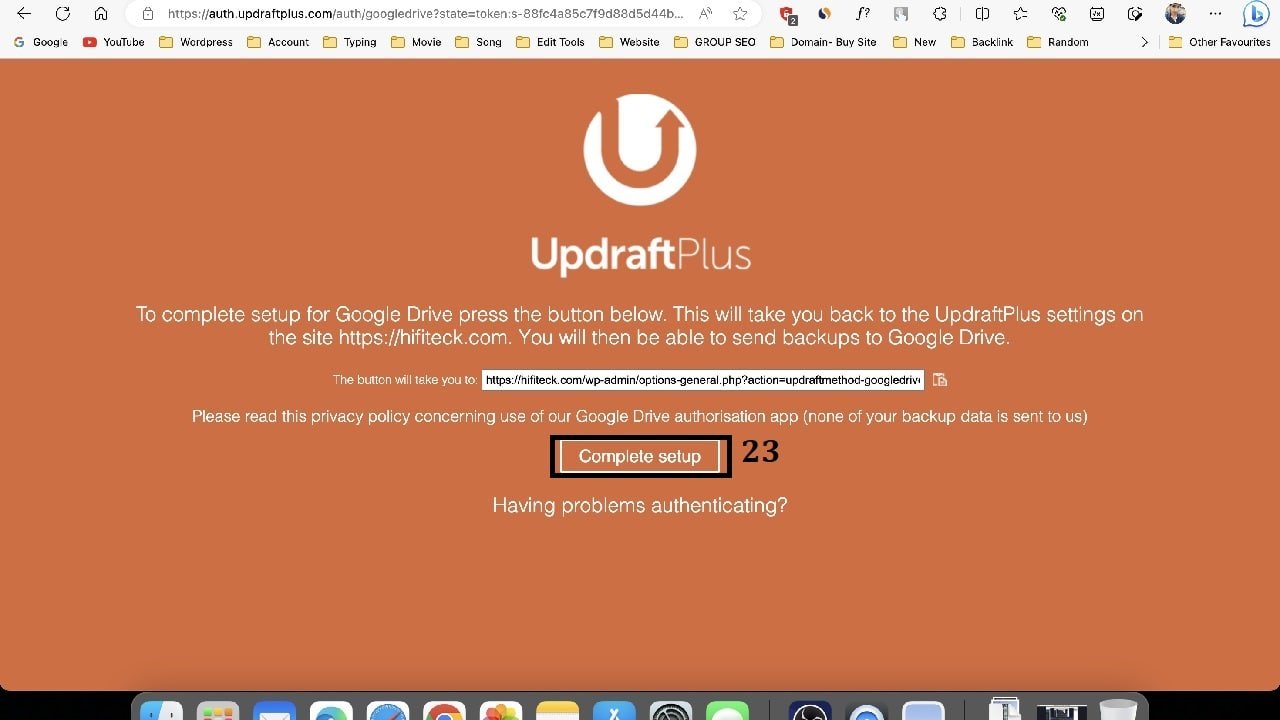
Click the “Complete Setup”
Step 3: Initiating a Backup
To initiate an immediate backup, click on the “Backup Now” button on the Updraft settings page.

To retain the automatic backup file, select the final option and proceed by clicking “Backup Now.


Once the backup process is complete, you will notice a lock symbol indicating that the backup file is not automatically deleted.

You can see the automatically created folder in Google Drive, whose name is UpdraftsPlus. & Here backup is completed.

Step 4: Restoring from a Backup
Step 4 holds immense significance in the website restoration process, thus we will thoroughly elaborate on it in a separate post.”
Frequently Asked Questions (FAQs)
Q1: Can I restore my website from a backup created with Updraft?
Yes, you can easily restore your website from a backup created with Updraft. Simply go to the “Backup/Restore” tab, select the backup file, and click on the “Restore” button.
Q2: Are there any limitations on the size of the backup?
The size of the backup depends on the storage capacity of your chosen remote storage option. However, Updraft allows you to split large backups into multiple files for easier management.
Q3: Can I schedule backups to run automatically?
Absolutely! Updraft offers flexible scheduling options, allowing you to set up automatic backups on a daily, weekly, or monthly basis.
Conclusion
In conclusion, knowing how to backup your WordPress website is crucial for safeguarding your valuable data and ensuring its uninterrupted availability. UpdraftPlus, as outlined in this guide, provides a comprehensive and user-friendly backup solution. By following the step-by-step instructions and configuring UpdraftPlus properly, you can automate the backup process, store your backups in reliable locations, and easily restore your website if any unexpected issues occur. Remember, a reliable backup strategy is an essential aspect of website maintenance, offering peace of mind and protection against potential data loss or system failures. Implementing UpdraftPlus will not only free up valuable time but also provide you with a reliable safety net for your WordPress website. So, don’t delay, start implementing these backup techniques today and ensure the long-term security of your WordPress website.
If you want to create a blog or your WordPress website, then you must read this post. – How to Start Blogging and Earn Money in India in 2023
If you want to use the calculator website, then definitely go to the given website.- CalculationClub